


To truly enhance artistry, what elegant photography tips improve beauty blog tutorials?

In the vibrant world of beauty blogging, captivating visuals are not just an asset; they are the cornerstone of engagement and persuasion. While the quality of your content and the depth of your advice are paramount, how you present that information through photography can either make your tutorials shine or cause them to blend into the noise. To truly enhance the artistry of your beauty blog tutorials and set them apart, it’s essential to master elegant photography techniques that elevate the overall aesthetic and impact.
Mastering Light: The Foundation of Flawless Beauty Shots
Light is perhaps the single most critical element in beauty photography. Harsh, unflattering light can obscure details, create undesirable shadows, and distort colors, undermining the very essence of a beauty tutorial. Prioritize soft, diffused light that illuminates your subject evenly. Natural window light is often the best choice; position your subject facing, or at a slight angle to, a large window on a bright, overcast day for a gentle, luminous glow. Avoid direct sunlight, which creates harsh shadows and overexposed highlights.
If natural light isn’t available or sufficient, invest in artificial lighting that mimics its softness. A ring light, for example, is a popular tool among beauty bloggers as it provides even, shadow-reducing illumination and creates an attractive catchlight in the eyes. Softboxes or umbrella lights positioned strategically can also deliver professional-grade results, ensuring your skin tones are accurate and your makeup applications are clearly visible.

Composition and Framing: Guiding the Viewer’s Eye
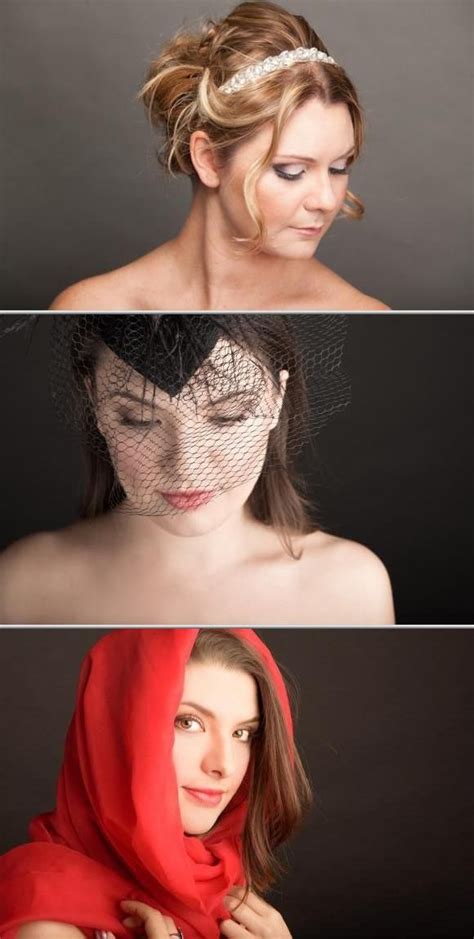
Thoughtful composition directs your audience’s attention to the most important aspects of your tutorial. Employ the rule of thirds, positioning key elements (like an eye, lip, or a product) along the intersecting lines or at their junctions for a more balanced and dynamic image. Experiment with different angles – a straight-on shot might be perfect for showcasing a full face of makeup, while a slight three-quarter view can add depth and dimension. Don’t be afraid to get close; intricate makeup details often require a tighter crop to truly appreciate the artistry.
Consider the background as well. A clean, uncluttered background ensures your subject remains the focal point. Use simple, complementary colors that don’t distract from the makeup or product you’re featuring. Sometimes, a subtle textured background can add visual interest without overpowering the main subject, contributing to a cohesive and elegant visual narrative.
Achieving Pin-Sharp Focus and Clarity
Blurry photos are the nemesis of any beauty tutorial. Ensure your camera is always in sharp focus on the key area you want to highlight—whether it’s the intricate eyeliner work, the precise lip definition, or the texture of a foundation. If using a DSLR or mirrorless camera, utilize a fast lens (e.g., f/1.8 or f/2.8) to create a beautiful shallow depth of field, artfully blurring the background and making your subject pop. This technique adds a professional and artistic touch, isolating the beauty detail.
For close-up shots demonstrating product textures or detailed application, consider macro photography. A macro lens (or a macro setting on some phones) allows you to capture incredible detail, revealing the shimmer of an eyeshadow or the smoothness of a cream in a way that truly enhances the visual story of your tutorial. Clarity and sharpness are paramount for effective demonstration.

Color Accuracy and Mindful Post-Processing
One of the biggest challenges in beauty photography is maintaining color accuracy. Products, especially foundations, concealers, and lipsticks, need to appear true to life. Always set your camera’s white balance correctly to match your lighting conditions (e.g., daylight, cloudy, incandescent). Incorrect white balance can cast an undesirable color tint, making a warm lipstick look cool or vice versa, misleading your audience.
When it comes to post-processing, less is often more. While light editing to correct exposure, contrast, and subtle color shifts is acceptable, avoid heavy filters or over-saturating colors that distort the product’s true appearance. The goal is to enhance, not to falsify. Consistency in your editing style across all your blog posts also contributes to a cohesive and professional brand image, solidifying trust with your readership.
Styling and Storytelling Through Thoughtful Props
Beyond the subject itself, the surrounding elements in your photographs contribute to the overall aesthetic and narrative. Thoughtful styling can elevate a simple product shot into a piece of art. Utilize relevant and aesthetically pleasing props such as fresh flowers, delicate brushes, elegant jewelry, or beautifully textured fabrics that complement the product or look you’re featuring. These elements should enhance, not distract, from the main subject, adding depth and a sense of luxury to your visuals.
Remember that every element in your frame tells a story. A well-placed, clean brush next to a palette suggests precision and care in application. A sprig of lavender next to a skincare product can evoke a sense of calm and natural ingredients. By curating your props and background, you create an entire mood and atmosphere around your beauty tutorial, making it more engaging and visually appealing to your audience.
Conclusion: Elevate Your Beauty Narrative
Implementing these elegant photography tips will undeniably improve the beauty and professionalism of your blog tutorials. By focusing on mastering light, refining composition, achieving sharp focus, ensuring color accuracy, and thoughtfully styling your shots, you move beyond merely documenting products and techniques. You begin to create art that truly captures the essence and allure of the beauty world, engaging your audience on a deeper visual level and solidifying your status as a sophisticated and authoritative voice in the beauty blogging community.