Mastering elegant artistry: How to customize tutorial techniques for your unique features?

In the vast world of beauty, makeup tutorials are invaluable guides, offering step-by-step instructions to achieve popular looks. However, a common misconception is that these techniques are one-size-fits-all. True mastery of elegant artistry lies not in replication, but in customization. Your face is a unique canvas, defined by distinct bone structure, eye shape, skin tone, and features that deserve a personalized approach. This guide will help you decode and adapt tutorial techniques to celebrate and enhance your individual beauty.
The Foundation: Understanding Your Unique Canvas
Before you even pick up a brush, the most crucial step is self-assessment. Take time to study your own features in a well-lit mirror. What is your face shape (oval, round, square, heart, long)? How do your eyes sit (hooded, almond, deep-set, prominent, downturned)? What is your skin’s undertone (warm, cool, neutral)? Where do your natural shadows and highlights fall?
Understanding these fundamental aspects of your face will empower you to interpret and modify any tutorial. For instance, a contour technique designed for an oval face might make a long face appear even longer, or disappear entirely on a very round face.

Decoding Tutorials: What to Adapt, What to Keep
Generic tutorials provide a roadmap, but you are the navigator. Learn to identify the core principle behind a technique rather than just copying the placement.
Face Shape & Contour/Highlight
Contouring and highlighting are perhaps the most adaptable techniques. A tutorial might show contouring under the cheekbones and along the jawline. For a round face, you might extend contour further up the temples to create more angles. For a long face, contouring the chin and hairline can help shorten the appearance. Highlighting placement should also adapt to bring forward areas you wish to emphasize, like the high points of your cheekbones or the bridge of your nose, relative to your face structure.
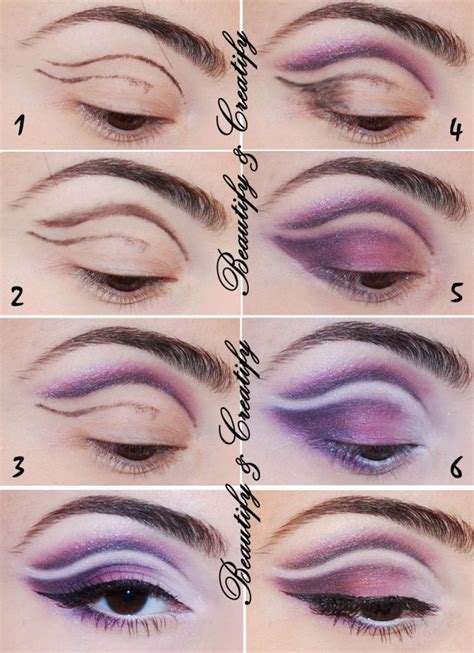
Eye Shape & Eyeliner/Eyeshadow
This is where customization truly shines. A sharp winged liner tutorial might be perfect for almond eyes but challenging for hooded eyes. For hooded eyes, consider a “flick out” technique where the liner is drawn thinly along the lash line and only winged out at the very outer corner, or opt for a “bat wing” liner that compensates for the hooded fold. For monolids, strategically placed eyeshadows can create depth, while for prominent eyes, darker shadows on the lid can recede them slightly.
Similarly, eyeshadow placement needs to be adapted. A cut crease might look different on a deep-set eye than on a prominent one. Focus on where light naturally hits and where shadows naturally fall on your eyes to guide your application.

Skin Tone & Color Selection
While a tutorial might recommend a specific shade of blush or lipstick, your skin tone and undertone are the ultimate deciders. Cool undertones often look best with berry, rose, and true red shades, while warm undertones suit peaches, corals, and orangey-reds. Foundations and concealers are non-negotiable for personalization – always match to your skin tone and undertone for a seamless blend.
Lip Shape & Lip Application
Whether you have full lips, thin lips, or an asymmetrical shape, a tutorial’s lip application can be modified. If you desire fuller lips, a slight over-lining with a nude pencil can work. If you have naturally full lips, focusing on precise definition rather than adding volume might be your goal. Embrace your natural lip shape and use techniques to refine or subtly enhance it.
Practical Customization Techniques
Practice & Experimentation
The only way to truly master customization is through practice. Don’t be afraid to try different placements, blendings, and products. Take photos of your attempts to see what works and what doesn’t from various angles. The bathroom mirror can sometimes be forgiving; a camera lens is often more revealing.

Invest in the Right Tools
Good quality brushes and appropriate lighting can make a world of difference. Different brush shapes are designed for different applications (e.g., fluffy blending brushes for diffusing eyeshadow, dense flat brushes for packing on color). Proper lighting ensures you see true colors and blends.
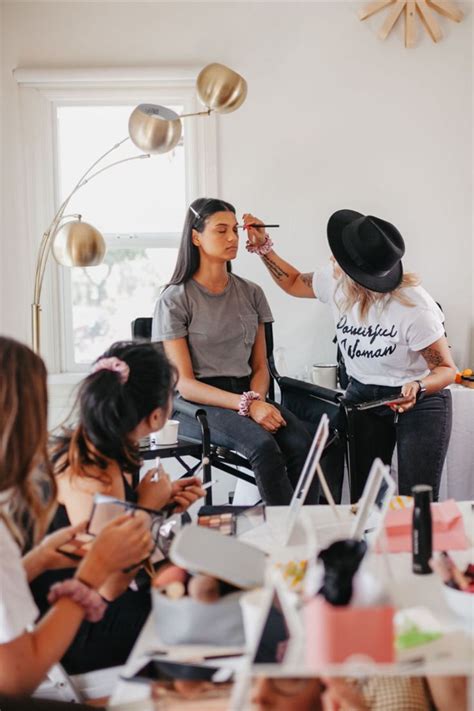
Seek Personalized Guidance
If you’re struggling, consider a personalized makeup lesson with a professional artist. They can provide tailored advice based on your specific features and help you adapt techniques effectively.

Elevating Your Artistry: Beyond the Basics
Ultimately, elegant artistry is about confidence and self-expression. Once you understand how to customize techniques, you’ll move beyond simply copying a look to creating your own signature style. Your makeup will feel more natural, more flattering, and truly an extension of your unique personality.
Embrace the journey of learning, adapting, and celebrating your individual beauty. Your face is a masterpiece; let your makeup reflect that unique elegance.