


How to effectively adapt tutorial techniques for elegant, personalized artistry?
Makeup tutorials have democratized beauty, offering a treasure trove of techniques and inspiration to millions. From smoky eyes to flawless foundations, these step-by-step guides are invaluable learning tools. However, true elegance in makeup artistry isn’t about blind replication; it’s about intelligent adaptation. The challenge lies in transforming a generic tutorial into a bespoke experience that celebrates your unique features and personal aesthetic. This guide will walk you through the process of dissecting, understanding, and artfully modifying tutorial techniques to cultivate your personalized artistry.
Understanding Your Canvas: Beyond the Basics
Before you can effectively adapt any technique, you must first deeply understand your own canvas – your face. Generic advice often overlooks the nuances that make each person unique. Take the time to identify your specific features:
- Face Shape: Is your face round, oval, square, heart, or long? This influences contouring, highlighting, and blush placement.
- Eye Shape: Do you have hooded, almond, monolid, round, or downturned eyes? Eyeliner and eyeshadow application methods vary dramatically for each.
- Skin Type & Concerns: Oily, dry, combination, or sensitive skin dictates product choices and application methods. Address concerns like acne, redness, or hyperpigmentation proactively.
- Skin Tone & Undertone: Accurately identifying your skin tone (light, medium, deep) and undertone (warm, cool, neutral) is crucial for foundation, concealer, blush, and lip color selection.
Becoming intimately familiar with these aspects of your face is the foundational step towards personalized artistry. It allows you to anticipate which parts of a tutorial might need adjustment.
Deconstructing Tutorials: What to Keep, What to Change
Approach every tutorial with a critical, analytical eye. Instead of simply following along, ask yourself:
- What is the core technique being taught? Is it a specific blending method, a highlighting placement, or a liner trick? Identify the fundamental skill.
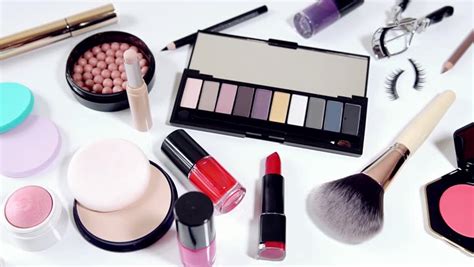
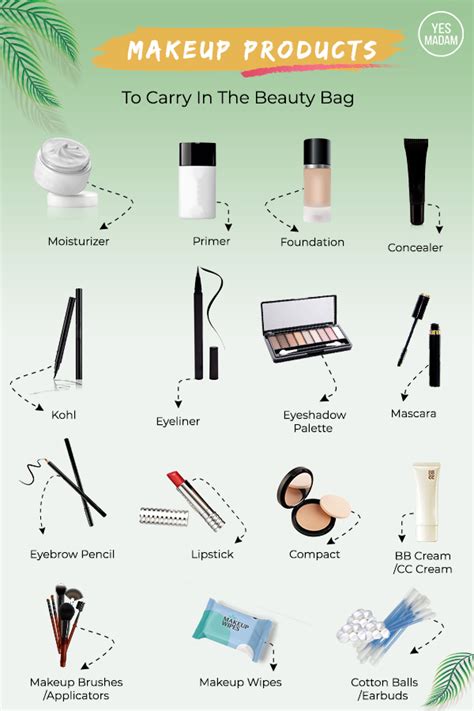
- What products are they using and why? Consider if a cream product could substitute for a powder, or if a different brush might work better for your skin type.
- How does the model’s face compare to mine? Pay attention to face shape, eye shape, and skin tone similarities or differences. This is your first clue for adaptation.
- What is the desired end effect? Is it subtle, dramatic, natural, or glamorous? Understanding the goal helps you adjust intensity.
By breaking down tutorials into their fundamental components, you can isolate techniques that are universally beneficial and those that are specific to the model’s features or the tutorial’s overall aesthetic.
The Art of Adaptation: Tailoring Techniques
Face Shape & Features
Contouring and highlighting are prime examples where adaptation is key. A contour placement perfect for a round face might look harsh on a long face. For a round face, you might focus on creating angles along the cheekbones and jawline. For a long face, you might soften the forehead and chin while highlighting horizontally across the center of the face to create width. Similarly, eyeliner techniques for hooded eyes differ significantly from those for almond eyes; the goal is always to enhance, not conceal, your natural beauty.
Skin Tone & Undertone
Foundation matching is perhaps the most critical adaptation. Never settle for a shade that doesn’t perfectly blend. Beyond foundation, consider blush and lipstick. A cool-toned berry might look stunning on someone with cool undertones, but clash with warm undertones, which might prefer a peachy coral. Eyeshadows, too, can be chosen to complement your undertone, making your eyes pop more effectively.
Personal Style & Occasion
A dramatic cut crease or heavy contour might be perfect for a photoshoot but overwhelming for a casual brunch. Adapt the intensity of the techniques to suit the occasion and your personal comfort level. Love a bold lip but prefer a softer eye? Embrace it! Your personal style should always be the ultimate filter through which you adapt any tutorial. Make it you.
Practice, Experimentation, and Trusting Your Eye
Mastering personalized artistry is an ongoing journey of practice and experimentation. Don’t be afraid to try techniques in ways that weren’t demonstrated in the tutorial. Mix colors, adjust placements, and apply products with different tools. Some attempts might not work out, and that’s perfectly fine – every ‘failure’ is a learning opportunity. Over time, you’ll develop an intuitive understanding of what works best for your face. Trust your own judgment and what you see in the mirror. The goal isn’t perfection, but rather enhancement that feels authentic to you.
Building Your Signature Look
As you consistently adapt and experiment, you’ll start to discover patterns and preferences that form the basis of your signature look. This isn’t about creating one static routine, but rather understanding a set of core techniques and product choices that consistently make you feel confident and beautiful. Your signature look is a flexible framework that allows for variations based on mood or occasion, all while staying true to your personalized aesthetic. It’s the culmination of intelligent adaptation and self-discovery.

Transforming from a tutorial follower to a personalized artist is an empowering evolution. It moves beyond simply copying trends to truly understanding and celebrating your unique beauty. By deconstructing techniques, intelligently adapting them to your features and style, and embracing experimentation, you unlock a world where every makeup application is not just a routine, but an elegant, personal expression of art.