


How to master seamless blending for an elegant, defined makeup finish?

The Art of Seamless Blending
Seamless blending is the cornerstone of any polished and professional makeup application. It’s the secret to transforming a collection of individual products into a cohesive, elegant, and defined look that appears effortless and natural. Without proper blending, even the most expensive products can fall flat, resulting in harsh lines, visible edges, and an unrefined appearance.
Mastering this technique ensures that your foundation melts into your skin, your eyeshadows transition gracefully, and your contour and blush appear as a natural extension of your bone structure rather than distinct stripes of color. It’s about creating an illusion of perfection, where no single product stands out but rather contributes to a harmonious whole.

Your Essential Blending Toolkit
To achieve truly seamless results, the right tools are as crucial as the technique itself. Invest in a variety of high-quality brushes, each designed for specific tasks. You’ll need fluffy brushes for diffusing eyeshadows, dense buffing brushes for foundation, smaller dome-shaped brushes for precise blending, and angled brushes for contour.
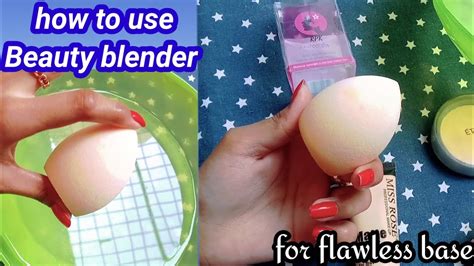
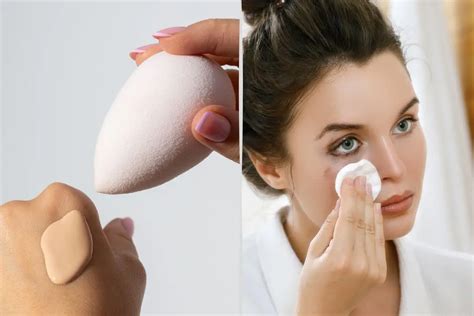
Beauty sponges, used damp, are also indispensable for pressing product into the skin, achieving an airbrushed finish for foundation and concealer. Don’t underestimate the power of your clean fingertips for warming up and blending cream products, as the natural heat can help them meld beautifully with your skin. Remember to clean your tools regularly to maintain their efficacy and prevent bacterial buildup.
Mastering the Base: Foundation & Concealer
Foundation Blending
Your base is the canvas, and proper blending here is paramount. Apply foundation in thin layers, working from the center of your face outwards. Use a damp beauty sponge or a dense buffing brush, employing stippling (tapping) and small circular motions to press and buff the product into your skin. Ensure there are no visible lines at your jawline, hairline, or around your ears. The goal is for your foundation to look like a second skin.
Concealer Blending
For concealer, less is often more. Apply sparingly to areas needing coverage (under eyes, blemishes) and use a smaller, fluffy brush or your ring finger to gently tap and blend the product into the surrounding skin. The key is to melt the edges into your foundation without rubbing away the coverage, creating a brightened and even complexion.
Eyeshadow: The Heart of Blending
Eyeshadow is where blending truly shines. The goal is to create a smooth gradient between different shades, making them appear as one cohesive color story rather than distinct blocks of color.
Transition Shades
Always start with a neutral transition shade in your crease. Use a fluffy blending brush with light, circular motions to diffuse the color, building it up gradually. This creates a soft base for subsequent darker shades to blend into.
Layering & Softening Edges
When applying darker shades, concentrate the color first and then use a clean, fluffy brush to gently soften the edges. Work in small, controlled motions, blending upwards and outwards. Repeatedly switch between your main application brush and a clean blending brush to ensure every edge is diffused and every color transition is seamless.

Sculpting with Contour & Highlight
Contour and highlight are designed to sculpt and define your face, but without blending, they can look unnatural and harsh. Apply contour products sparingly to the hollows of your cheeks, jawline, and temples. Using a soft, angled brush, blend the product upwards into your hairline and downwards onto your neck, ensuring no harsh lines remain.
For highlight, apply to the high points of your face (cheekbones, brow bone, bridge of nose) and gently tap or buff the edges with your fingertips or a small brush until it appears to melt into your skin, catching the light beautifully without looking like a stripe of shimmer.
Blush for a Natural Flush
Blush adds life and warmth to your face. Apply it to the apples of your cheeks, then blend upwards towards your temples using a fluffy blush brush. Ensure the edges of your blush seamlessly merge with your foundation, contour, and highlight, creating a healthy, natural flush that appears to emanate from within your skin.
Common Blending Mistakes to Avoid
- Too Much Product: Applying too much at once makes blending difficult and can lead to a cakey finish. Build up color in thin layers.
- Wrong Tools: Using a dense brush for fluffy blending or vice-versa will yield poor results.
- Insufficient Blending: Leaving visible lines or patchy areas. Patience is key!
- Over-Blending: While less common, excessively blending can remove too much product, making colors look muddy or disappear entirely.
Pro Tips for a Flawless Finish
For truly professional results, always blend in good lighting, preferably natural daylight, to catch any unblended spots. Use a mirror that allows you to see your full face. Practice different motions – circular, back-and-forth, tapping – to see what works best for each product and area of your face. Remember that blending is a process; take your time and be patient. Investing in quality products also makes a significant difference, as well-formulated makeup tends to blend more smoothly.
Conclusion
Mastering seamless blending is a skill that elevates your entire makeup game, transforming ordinary applications into elegant, defined, and professional finishes. It requires patience, practice, and the right tools, but the payoff is a beautifully harmonious look where every element works together in perfect synchronicity. Embrace the journey of learning to blend, and you’ll unlock the secret to truly captivating makeup.