


To enhance artistry, what specific video editing tips improve complex makeup tutorials?
The Art of Transformation: Elevating Complex Makeup Tutorials Through Editing
Complex makeup tutorials are a delicate dance between detailed instruction and captivating visual storytelling. For creators looking to showcase true artistry, raw footage simply isn’t enough. Professional video editing transforms a mere demonstration into an immersive experience, highlighting the intricate details and the skill involved. It’s about more than just cutting clips; it’s about shaping perception, guiding the viewer’s eye, and ultimately, enhancing the perceived artistry of your work.
Strategic Pacing and Flow: Guiding the Viewer’s Journey
One of the most crucial aspects of editing complex tutorials is pacing. Not every step requires real-time viewing. Speed ramps (or time remapping) are your best friend here. Speed up repetitive or less critical actions like foundation application or blending, but slow down for precise details, such as intricate eyeliner wings, detailed eyeshadow blending, or delicate brow strokes. This keeps the viewer engaged without feeling overwhelmed by long, drawn-out segments. Furthermore, intelligent use of jump cuts can maintain energy, but ensure they are smooth and don’t disorient the viewer. Seamless transitions, rather than abrupt cuts, can make the entire process feel more fluid and professional.
The Power of the Close-Up: Highlighting Detail and Precision
Complex makeup relies on precision. Your editing should reflect this by strategically incorporating extreme close-ups. Don’t just show the face; zoom in on the brush touching the skin, the sparkle of glitter, the texture of a product, or the precise placement of a liner. These micro-moments are where true artistry shines, allowing your audience to appreciate the minute details that make your work stand out. Ensure these close-ups are well-lit and in sharp focus to maximize their impact.
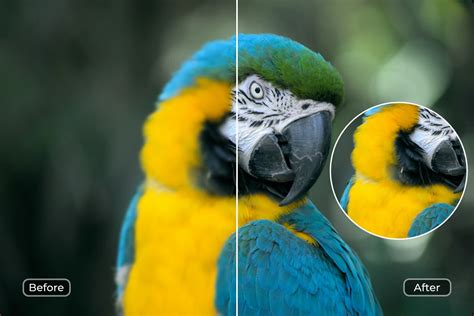
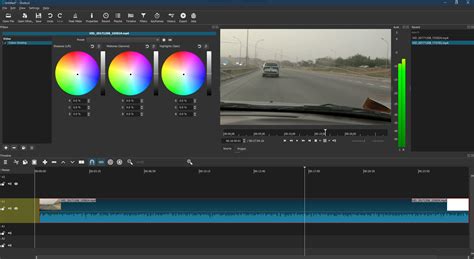
Color Grading and Correction: Enhancing Visual Appeal and Accuracy
Lighting and skin tones can often look different on camera than in real life. Color correction is essential to ensure your makeup colors are accurately represented and your skin tones look natural and healthy. Go a step further with color grading to establish a consistent aesthetic and mood throughout your tutorial. A slightly warmer or cooler tone, or a specific film look, can add a layer of sophistication and artistic flair, making your tutorial visually cohesive and appealing. Remember, the goal is to enhance, not distort, the true colors of your makeup.

Audio Fidelity and Music Selection: Setting the Mood and Clarity
While often overlooked in visual arts, sound plays a massive role in viewer experience. Ensure your voiceover is clear, crisp, and free from background noise. A good microphone and proper audio mixing are non-negotiable. Beyond dialogue, strategically chosen background music can significantly elevate the artistry of your tutorial. Use instrumental tracks that complement the mood – perhaps something upbeat for faster segments and calming for detailed work. Ensure the music doesn’t overpower your voice and fades subtly during critical instructional moments. Sound effects, sparingly used, can also emphasize key actions like a click of a palette or the swish of a brush.
Dynamic Text Overlays and Graphic Elements: Information at a Glance
For complex tutorials, information is key. Dynamic text overlays can highlight product names, shade numbers, or specific techniques without interrupting the visual flow. Instead of static blocks of text, use animated titles or elegant lower thirds that pop in and out smoothly. Consider incorporating simple graphic elements, like arrows or circles, to direct the viewer’s attention to a particular area of the face during a tricky application. These visual aids are especially helpful for viewers who might be new to makeup or struggling to follow a complex step.

Multi-Camera Angles and Cutaways: Adding Depth and Interest
Shooting from multiple angles provides more flexibility in the editing room. Instead of showing the same frontal shot throughout, cut to a side profile, an overhead view, or even an extreme close-up of the product itself. These cutaways break monotony, add visual interest, and can offer a clearer perspective on certain techniques. They also allow you to hide minor mistakes or re-focus the viewer’s attention if a particular shot wasn’t perfect. The variety of angles mimics a professional production, underscoring the artistic effort.

Final Polish: Intros, Outros, and Call-to-Actions
A professional intro and outro frame your tutorial beautifully. Your intro should be short, engaging, and branded, setting the stage for the artistry to come. The outro is your opportunity to add value and encourage engagement – include a clear call-to-action (e.g., subscribe, like, comment, visit social media), and perhaps a blooper reel or a quick montage of other looks. These elements provide a polished, complete viewing experience, reinforcing your professionalism and artistic brand.

Conclusion: Beyond the Brush
Enhancing the artistry of complex makeup tutorials goes far beyond the skill with a brush; it extends into the realm of post-production. By meticulously applying strategic pacing, close-ups, expert color grading, impeccable audio, dynamic graphics, and varied camera angles, you transform a simple how-to into a captivating piece of visual art. These editing tips don’t just improve your tutorials; they elevate your entire brand, showcasing your dedication to excellence and your true artistic vision.