


What camera/lighting setup best showcases intricate makeup artistry elegantly?
Capturing the Nuance: Why Photography Matters for Makeup Artistry
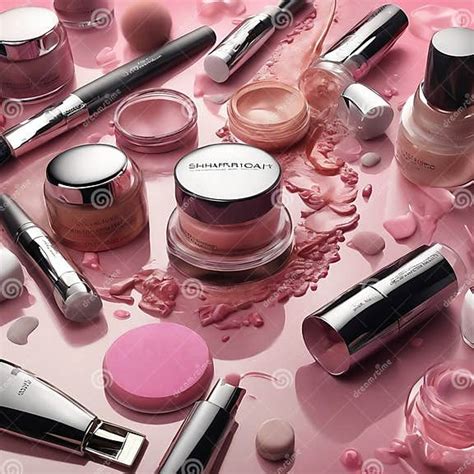
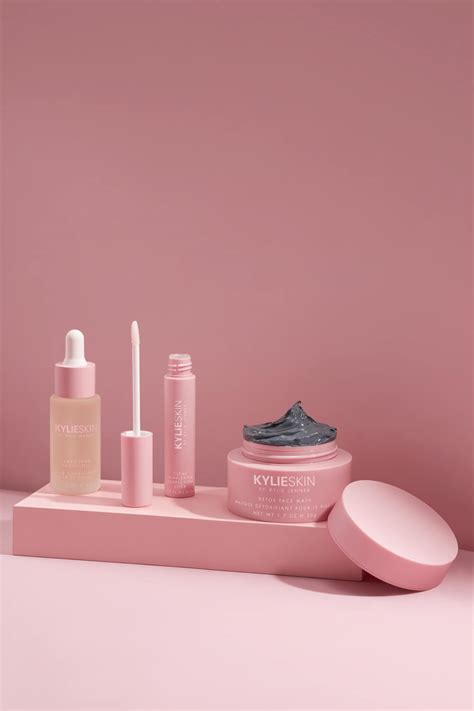
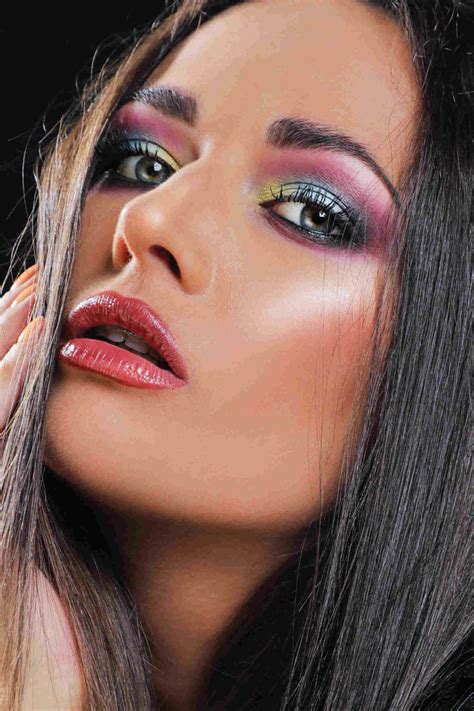
For makeup artists, their face is their canvas, and their skill is in the intricate details. However, translating that ephemeral, three-dimensional artistry into a compelling two-dimensional image requires more than just a smartphone snapshot. The right camera and lighting setup can elevate your portfolio, showcasing every delicate brushstroke, precise line, and shimmering pigment with the elegance it deserves. Without a thoughtful approach, even the most breathtaking makeup can fall flat in photographs, losing its depth, texture, and true color.
The Right Lens: Unveiling Detail with Precision
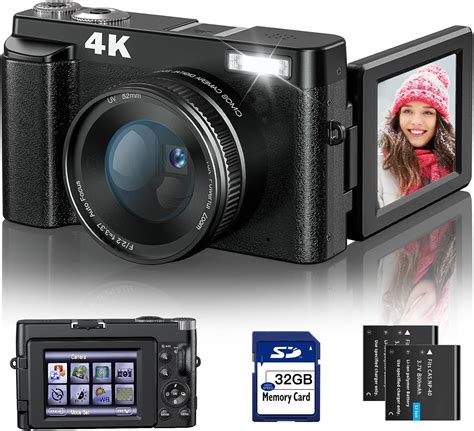
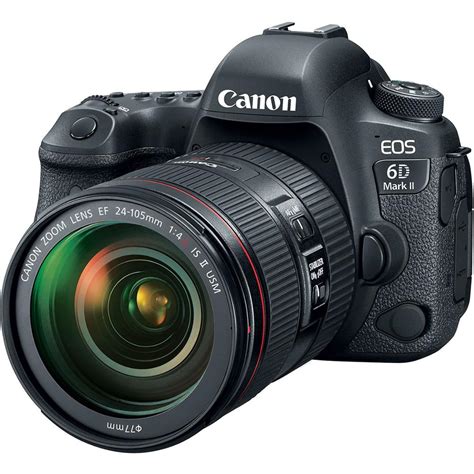
Choosing the correct camera body and, more importantly, the right lens, is fundamental. While a full-frame DSLR or mirrorless camera offers excellent image quality and low-light performance, many crop-sensor bodies can also deliver stunning results. Focus on a camera with a good megapixel count for detailed cropping potential.
The real secret lies in the lens. For intricate makeup artistry, a macro lens is often indispensable. These lenses allow for extreme close-ups, capturing the texture of eyeshadow, the individual lashes, and the meticulous details of lip art that a standard lens might miss. Look for macro lenses in the 50mm-100mm range (e.g., 100mm f/2.8 macro for full-frame or 60mm f/2.8 macro for crop-sensor). Alternatively, a sharp prime lens (like a 50mm f/1.8 or 85mm f/1.8) can also be excellent for overall beauty shots, offering beautiful bokeh and superior sharpness, though without the same magnification as a dedicated macro.
Mastering Light: Sculpting Features and Enhancing Texture
Lighting is arguably the most critical element in makeup photography. Harsh, direct light can create unflattering shadows, blow out highlights, and obscure delicate details. The goal is almost always soft, diffused light that gently wraps around the subject, enhancing contours without creating stark contrasts. It also helps to accurately represent colors and textures.
Natural Light: Simplicity and Softness
If artificial lighting seems daunting, start with natural light. A large window, ideally facing north to provide consistent, soft light throughout the day, can be a fantastic asset. Position your subject facing the window, allowing the light to illuminate their face evenly. Avoid direct sunlight, which is too harsh. Overcast days offer nature’s largest softbox, providing beautifully diffused light outdoors. The ‘golden hour’ (shortly after sunrise or before sunset) can also provide a warm, flattering glow, though its specific color temperature might alter makeup tones.
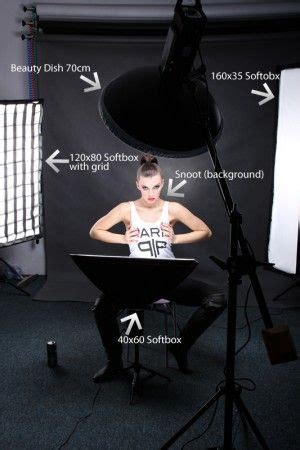
Artificial Lighting Setups: Control and Consistency
For ultimate control and consistency, especially indoors or during varying light conditions, artificial lighting is key.
- Ring Light: A popular choice for makeup artists due to its ability to provide even, shadowless illumination directly on the face. It creates a distinctive circular catchlight in the eyes. While great for showing overall makeup, it can sometimes flatten features.
- Softboxes/Octaboxes: These modifiers attach to studio strobes or continuous LED lights and produce a large, soft, directional light source. A single large softbox (e.g., 3-foot octabox) positioned slightly above and to one side of the subject can create flattering light with gentle shadows that add dimension.
- Clamshell Lighting: This setup uses two light sources (often softboxes or large reflectors) – one above and one below the subject, creating a flattering, almost shadowless light that opens up facial features.
- LED Panels: Modern LED panels offer continuous light, adjustable color temperature, and dimming capabilities, making them versatile for beauty work. Paired with diffusion, they can mimic soft window light.
When using artificial light, consider placing a reflector opposite your main light source to fill in shadows and bounce light back onto the subject, further softening the overall look.
Essential Camera Settings for Flawless Makeup Shots
Even with the best gear, incorrect camera settings can ruin a shot. Here’s what to focus on:
- Aperture (f-stop): For overall beauty shots, an aperture between f/5.6 and f/11 is often ideal. This ensures that the entire face is in focus while still allowing for a pleasing background blur. For extreme macro shots focusing on a single eye or lip detail, you might open up to f/2.8 or f/4 to isolate the specific feature, but be mindful of a very shallow depth of field.
- Shutter Speed: When shooting handheld, aim for at least 1/125th of a second to prevent motion blur. If using a tripod and your subject is perfectly still, you can go lower.
- ISO: Keep your ISO as low as possible (e.g., ISO 100-400) to minimize digital noise, which can degrade image quality and obscure fine details. Good lighting reduces the need for high ISO.
- White Balance: Crucial for accurate skin tones and makeup colors. Use a custom white balance or select a preset that matches your light source (e.g., ‘Cloudy’ for natural window light, ‘Tungsten’ for incandescent, or ‘Flash’ for strobes). Shooting in RAW format allows for more flexibility in adjusting white balance in post-processing.
Composition and Posing: Highlighting the Artistry
Beyond technical settings, how you compose and pose your subject significantly impacts the final image. Think about the specific makeup elements you want to highlight. For intricate eye makeup, a slight tilt of the head or a direct, slightly elevated angle might work best. For lip art, a clear shot of the lips with a clean background is essential.
Ensure the background is uncluttered and doesn’t distract from the makeup. Simple, neutral backdrops (white, grey, or black fabric) work wonders. Pay attention to the model’s expression; a confident, elegant pose enhances the overall professionalism of the shot.

The Final Polish: Subtle Enhancements in Post-Production
Even with perfect shooting, post-processing is an important step. Use software like Adobe Lightroom or Photoshop for subtle adjustments. Focus on:
- Color Correction: Fine-tune white balance and color vibrancy to ensure makeup colors are true-to-life.
- Exposure and Contrast: Adjust these to make the image pop, enhancing details without overdoing it.
- Subtle Sharpening: Apply minimal sharpening to bring out the fine details of the makeup.
- Light Skin Retouching: While the focus is on makeup, light retouching for skin blemishes can create a cleaner canvas, but avoid excessive smoothing that obliterates texture.
The key here is subtlety; the goal is to enhance, not to alter the artistry.
Conclusion: Your Canvas, Captured Perfectly
Elegantly showcasing intricate makeup artistry is a blend of technical knowledge, artistic vision, and meticulous attention to detail. By investing in the right camera (especially a good macro lens), mastering soft and diffused lighting techniques, dialing in your camera settings, and refining your composition and post-processing, you can create stunning images that truly do justice to the magnificent work you put into every face. Practice, experiment, and let your photography become as refined as your makeup artistry.