


What’s the best way to photograph art for an elegant Pro Artist Portfolio?

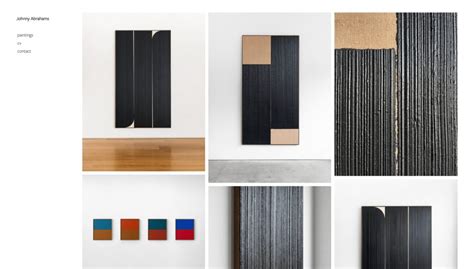
A stunning artist portfolio isn’t just about the art itself; it’s also about how that art is presented. For professional artists, high-quality photographic documentation of their work is paramount. Poor photographs can diminish even the most exquisite piece, while expertly captured images can elevate your portfolio, making a powerful statement to galleries, collectors, and potential clients. The goal is to represent your art accurately, beautifully, and professionally, ensuring every detail and nuance is preserved.
Mastering the Art of Lighting
Lighting is arguably the most critical factor in art photography. The right light can reveal textures, colors, and dimensions accurately, while the wrong light can cast unflattering shadows, create glare, or distort true colors. Natural, indirect daylight is often the preferred choice for its softness and color accuracy. Position your artwork perpendicular to a large window, avoiding direct sunlight which can cause harsh highlights and shadows. Overcast days are ideal as they provide diffused, even light.
If natural light isn’t feasible, a controlled artificial lighting setup is necessary. Use two continuous light sources (like LED panels or softboxes) placed at a 45-degree angle to the artwork, equidistant from the piece, to eliminate shadows and minimize glare, especially on glossy surfaces. Diffusers are essential to soften the light and prevent hot spots. Consistency in your lighting setup across all pieces will help maintain a uniform look in your portfolio.

Choosing Your Gear and Settings
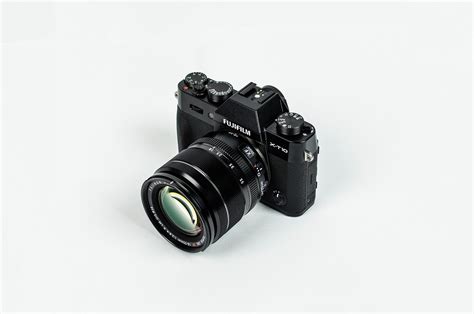
While smartphone cameras have improved, for a truly professional portfolio, a DSLR or mirrorless camera is highly recommended. These cameras offer greater control over settings, allowing for higher resolution and better image quality. A sturdy tripod is non-negotiable; it ensures sharp images by eliminating camera shake and allows you to use slower shutter speeds for optimal exposure without increasing ISO too much, which can introduce noise.
Key camera settings to consider include a low ISO (100-200) for minimal noise, an aperture of around f/8 to f/11 for maximum depth of field and sharpness across the entire artwork, and a shutter speed adjusted to achieve proper exposure. Always use a manual white balance setting, calibrated to your specific lighting conditions, to ensure accurate color reproduction. Shooting in RAW format is crucial as it captures the most image data, providing greater flexibility during post-processing.
Staging and Backgrounds
The environment surrounding your artwork in the photograph plays a significant role in its presentation. A clean, neutral background is always best to keep the focus solely on the art. White, black, or various shades of gray poster board or fabric work well. For two-dimensional pieces, ensure the artwork is perfectly flat and square to the camera. Use a level and a measuring tape to confirm alignment.
For three-dimensional sculptures or installations, consider how the piece interacts with its space. A seamless backdrop can create a floating effect, while a subtle prop can offer a sense of scale, provided it doesn’t distract from the artwork. Photographing 3D objects often requires multiple angles to convey their full form and texture, ensuring consistent lighting across all shots.
The Indispensable Role of Post-Processing
Even with the best shooting techniques, post-processing is a vital step in refining your images. Software like Adobe Photoshop or Lightroom allows you to make necessary adjustments to perfect your artwork’s representation. Essential steps include cropping and straightening to ensure perfect alignment and composition, and color correction to match the digital image to the physical artwork as closely as possible. Use reference images and a calibrated monitor to ensure accuracy.
Further refinements might include adjusting exposure, contrast, and clarity, and gently sharpening the image. Be careful not to over-process; the goal is to enhance, not alter, the artwork’s original appearance. Remove any dust spots or minor imperfections that may have appeared during the shoot. The final result should be a pristine, true-to-life representation of your artistic creation.

Consistency and Review
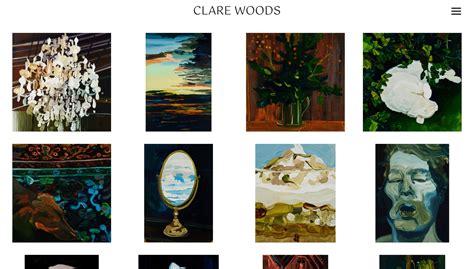
Maintaining a consistent aesthetic throughout your portfolio photographs is key to a polished professional presentation. This means uniform lighting, backgrounds, and post-processing styles. When presenting a series of works, this consistency helps to create a cohesive and strong visual narrative.
Once you’ve photographed and processed your art, take the time to critically review your images. View them on different screens and perhaps print a few to check color accuracy. It can also be incredibly beneficial to get feedback from trusted peers or mentors. They might spot details or inconsistencies you’ve overlooked, helping you to refine your approach further.

Investing time and effort into high-quality photography for your artist portfolio is an investment in your professional career. It demonstrates a commitment to excellence, not just in your art, but in how you present it to the world. By following these guidelines, you can ensure your elegant pro artist portfolio truly shines, showcasing your masterpieces in their best possible light.