


How to adapt pro makeup tutorial techniques for my unique features & elegance?

Beyond the Copy-Paste: Mastering Makeup for Your Unique Beauty
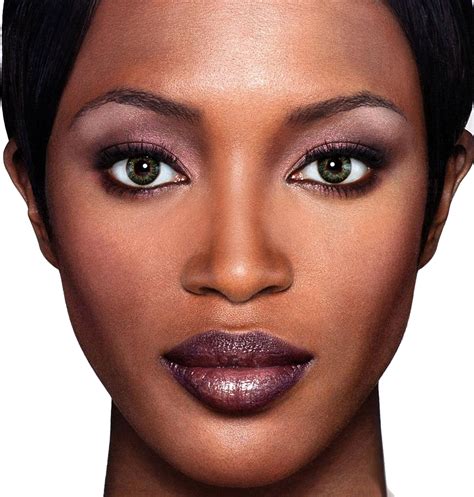
It’s easy to get lost in the endless stream of mesmerizing pro makeup tutorials. Flawless contour, dramatic eyes, perfectly sculpted brows – they all look incredible on screen. But what happens when you try to replicate them, only to find the results don’t quite translate to your face? The secret isn’t to abandon tutorials; it’s to adapt them. Your unique facial features and personal sense of elegance are your greatest assets, and learning to tailor professional techniques will unlock your most beautiful, authentic look.
Understand Your Canvas: A Self-Assessment Guide
Before you can adapt, you must know what you’re working with. Take a moment for a honest self-assessment:
- Face Shape: Is it round, oval, square, heart, long, or diamond? This dictates where contour, blush, and highlight should be placed.
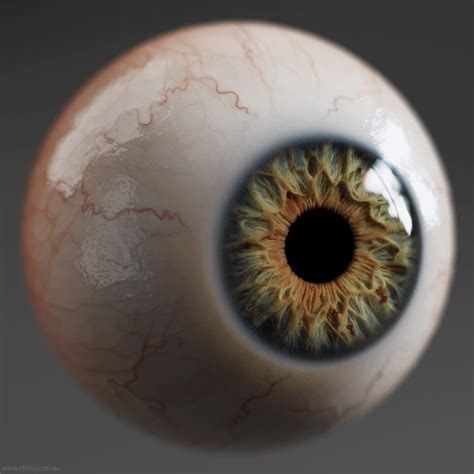
- Eye Shape & Placement: Are your eyes almond, round, hooded, monolid, downturned, upturned, close-set, or wide-set? These details profoundly impact eyeliner, eyeshadow, and lash application.
- Brow Shape & Density: Natural brows are crucial for framing the face. Consider their arch, length, and any sparse areas.
- Lip Shape & Fullness: Do you have a prominent cupid’s bow? Are your lips full or thin? This influences lip liner and color choices.
- Skin Tone & Undertone: Are you warm, cool, or neutral? This is fundamental for foundation, concealer, and color palettes.
- Skin Type & Concerns: Oily, dry, combination, sensitive, acne-prone? This affects product choice and application technique for longevity and finish.
Deconstructing Professional Techniques: The ‘Why’ Behind the ‘How’
Professional artists use techniques for specific reasons. Instead of just mimicking the steps, try to understand the underlying principle:
- Contouring: The ‘why’ is to create shadows and depth, not just to draw lines.
- Highlighting: The ‘why’ is to bring areas forward and add luminosity, not just to add glitter.
- Eyeshadow Placement: The ‘why’ is to create dimension, define the crease, or lift the eye, not just to blend colors together.
- Eyeliner: The ‘why’ is to define the lash line, create illusion of fullness, or alter eye shape.
Once you grasp the objective, you can find a unique path to achieve it on your face.

Adapting Key Techniques for Your Features
1. Face Contouring & Highlighting
A pro tutorial might show contouring under the cheekbones and along the jaw. For a round face, you might extend contour further inwards to create more definition. For a long face, contouring the hairline and chin can help shorten the appearance. Highlighting should always go on the high points where light naturally hits, but tailor the intensity and placement to your face shape to enhance rather than overpower.
2. Eye Makeup Magic
- Hooded Eyes: Instead of applying dark shadow to the mobile lid which disappears, focus on defining the visible portion above the crease (faux crease) and using lighter shimmers on the lid itself. Tightlining is your best friend.
- Downturned Eyes: Create a lifting effect with eyeliner by extending it slightly upwards at the outer corner, and place darker shadows above the natural lash line rather than following the downward curve.
- Close-Set Eyes: Focus lighter shadows and highlight on the inner corner to open them up, gradually deepening color towards the outer corner. Keep eyeliner thinner on the inner half.
- Monolid Eyes: Experiment with gradient washes of color that blend upwards towards the brow bone, or focus on a smoked-out lash line for definition.
3. Brows & Lips
- Brows: If a tutorial suggests a dramatic arch, but your natural brows are straighter, work with your natural shape. A slight lift can be achieved without completely redrawing. Focus on filling sparse areas and defining your existing arch.
- Lips: Pro lip techniques often involve overlining. Adapt this subtly to your natural lip line to create a fuller effect without looking unnatural. If you have thin lips, opt for lighter, glossier shades. For full lips, darker or bolder colors can be stunning.
Embrace Your Elegance: The Final Touch
Elegance in makeup isn’t about perfection; it’s about harmony and confidence. It means choosing colors and finishes that complement your skin tone and personal style. It’s about knowing when to go bold and when to keep it subtle. Perhaps you prefer a soft, diffused look over sharp lines, or a dewy finish over matte. Incorporate these preferences into adapted techniques.
- Product Selection: Choose formulas that work for your skin type and preferred finish (e.g., radiant foundation for dry skin, oil-controlling primer for oily skin).
- Color Palette: Use your undertone as a guide. Warm undertones often shine in earthy tones, gold, and peach; cool undertones in silvers, blues, and berries.
- Personal Style: Do you gravitate towards classic, modern, bohemian, or edgy looks? Let this guide your choices in color, intensity, and overall vibe.
Practice is key. Experiment in front of a mirror, take photos in different lighting, and don’t be afraid to try new things. Over time, you’ll develop an intuitive understanding of what works for you, transforming generic professional advice into your signature elegance.
Conclusion
Adapting pro makeup tutorials for your unique features and elegance is an empowering journey. By understanding your facial topography, dissecting the ‘why’ behind techniques, and injecting your personal style, you move beyond mere imitation. You become your own makeup artist, confidently crafting looks that not only highlight your individual beauty but also exude a timeless, authentic elegance that is uniquely yours.