


How to personalize tutorial looks for your unique elegance & features?

Beyond the Generic: Crafting Your Signature Look
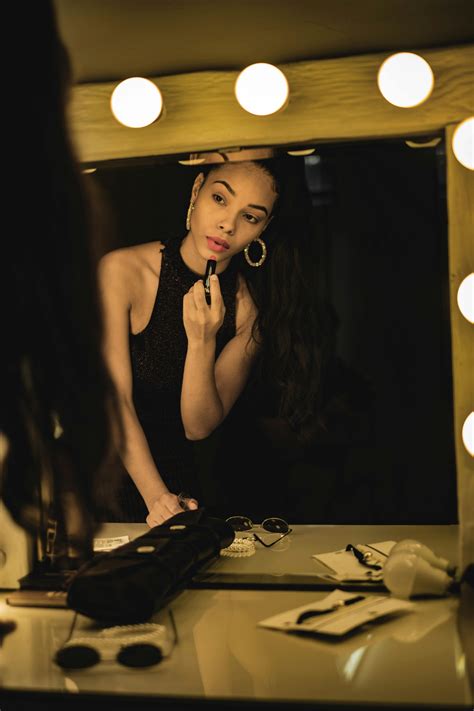
In the vast world of online makeup tutorials, it’s easy to get lost in the pursuit of replicating a look seen on someone else. While these guides offer fantastic techniques and inspiration, they are often designed for a generic face, skin tone, and set of features. The true artistry of makeup lies not in imitation, but in adaptation – understanding how to personalize those trending looks to perfectly complement and enhance your unique elegance.
The Foundation of Personalization: Knowing Your Features
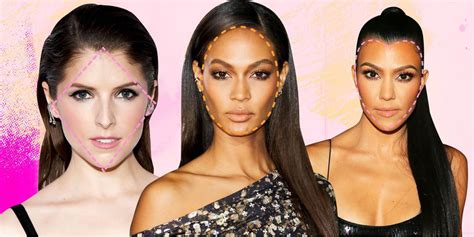
Before you can adapt, you must first understand what makes you, uniquely you. Take time to analyze your facial structure:
- Face Shape: Is your face oval, round, square, heart-shaped, or long? This dictates where contour, blush, and highlight should be placed.
- Eye Shape & Color: Almond, hooded, monolid, downturned, or upturned? The placement of eyeshadow, liner, and mascara will vary dramatically. Consider your eye color when choosing complementary shadow shades.
- Lip Shape: Full, thin, asymmetrical? This guides lipstick application and liner choices.
- Skin Tone & Undertone: Fair, light, medium, tan, or deep? Warm, cool, or neutral undertones? This is crucial for selecting the right foundation, concealer, blush, and lip colors.
- Brow Shape: Your natural brow arch significantly frames your face.
Once you have a clear picture of your individual canvas, you can begin to thoughtfully modify tutorial instructions.
Adapting Key Makeup Techniques
Eyes: The Window to Your Soul, Customized
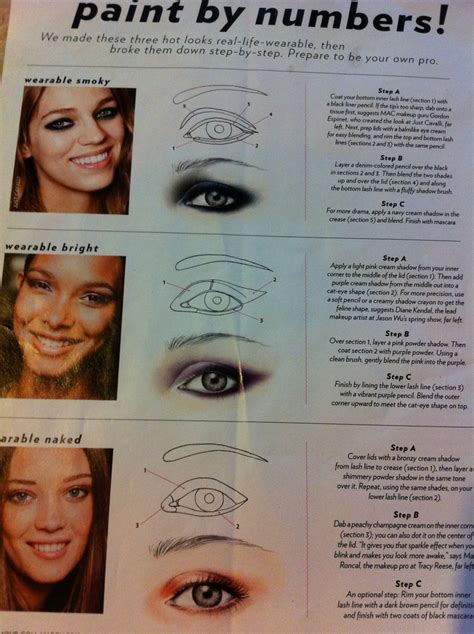
Eye makeup is one of the most transformative elements. If a tutorial shows a cut crease, but you have hooded eyes, you might need to place the crease color higher on your lid to make it visible. For downturned eyes, an upward flick of liner can create a lifted effect, while round eyes benefit from extended liner to elongate. Experiment with shadow placement and blending techniques to suit your specific eye shape, ensuring colors enhance your natural eye color.
Face Sculpting: Contour, Highlight & Blush
Generic contouring often follows a standard “3” shape, but this isn’t universal. If you have a round face, you might focus contour along the jawline and temples to create definition. For a longer face, contouring the chin and hairline can help shorten its appearance. Highlighting should be placed where light naturally hits your face to accentuate your best features, not just where the tutorial dictates. Blush application should also be tailored to lift or widen the face as desired.
Embracing Your Personal Style and Comfort
Beyond your physical features, your personal style, comfort level, and the occasion play a huge role in personalization. Are you going for a subtle everyday look, or a dramatic evening statement? Do you prefer matte finishes or dewy glows? Don’t be afraid to swap out a bold red lip from a tutorial for a nude shade if that feels more “you,” or to dial down a smoky eye for something softer. Makeup should make you feel confident and authentic.
- Color Palette: Choose colors that resonate with your personal aesthetic and complement your skin tone, rather than simply replicating what’s shown.
- Intensity: Adjust the intensity of application. You might prefer a softer blend for your eyeshadow or a lighter hand with contour.
- Product Swaps: Substitute products. If a tutorial uses a cream blush but you prefer powder, make the switch!
Conclusion: Your Face, Your Rules
Personalizing makeup tutorials transforms them from prescriptive guides into creative jumping-off points. By understanding your unique features and listening to your personal style, you unlock the power to create looks that truly reflect your elegance and enhance your natural beauty. The goal isn’t perfection by someone else’s standards, but self-expression and confidence in your own unique way. So, grab your brushes, look in the mirror, and start painting a picture that is uniquely, beautifully you.